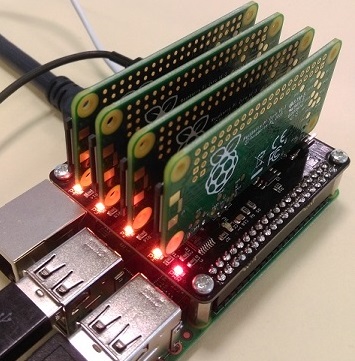
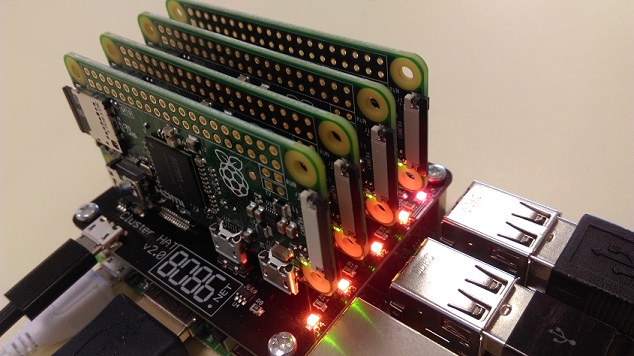
Ingredients
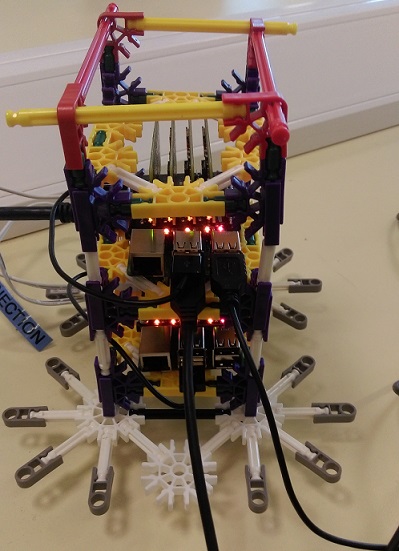
These are all of the bits and pieces involved in contructing
our Raspberry Bush, and each individual Bramble

Recipe
Now that we have gathered our ingredients, we now need to prepare them. This requires firstly assembling the ClusterHat, and then flashing the images to your micro SD cards. The ClusterHat site itself has a pretty robust guide on this, so we will link to it here. We recommend using etcher to flash the sd cards.
Once assembled, flashed, and booted, follow these steps:
- To begin with, if you haven't already, turn on the clusterhat with the command, “clusterhat on”.
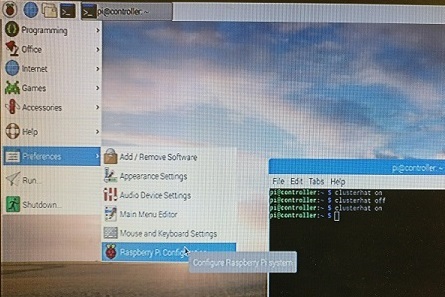
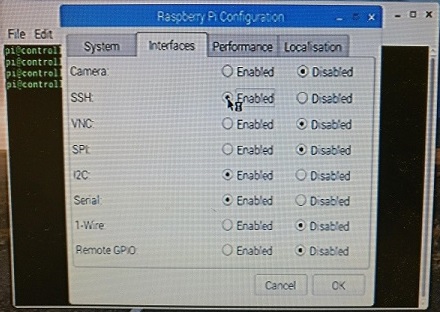
- Turn ssh on by default, it will initially be off. There are two ways to do this, by using the gui, or the terminal.
- The gui way.
- The terminal way. Type in “sudo raspi-config”. Go into interfaces, then select ssh, and finally, select yes. It will now be turned on by default.
- Once done on the main one, needs to be done to the rest of the pi zeros. Do this, you need to firstly need to use the command “minicom” follow by the hostname of the pi zero, for example, “minicom p1”. Once in, follow step 2b to setup ssh. Repeat for all pi zeros.
- Once done, generate an rsa key, “ssh-keygen -t rsa”.
- To get passwordless access into the pi’s, run the following command, “for I in 1 2 3 4; do ssh-copy-id pi@p$I.local;done”.
- If you are using v1.3 of pi zeros, you will run into the issue of having no wifi.Note: Before following the steps below please ensure that you have all devices using the same version of the OS image ie 2018, as there are potential version conflict issues.
- ssh into each of the pi zeros and add your wifi details wpa_supplicant.conf file.
This will make more sense in a bit when we are installing docker. Just “sudo nano /etc/wpa_supplicant/wpa_supplicants.conf” and add your network details i.e.
network = {
ssid="HOMEWIFI"
psk="12345678"
} - You may have to reboot, to do so, “sudo reboot”.
- Before continuing on you may have some memory size errors when downloading matplotlib, therefore you will want to look here for solutions
- It is necessary to download matplotlib for both the Raspberry Pi, and the Pi Zeros located on your clusterhat, this is done using "sudo apt-get install python-matplotlib" and may take a while.
- Once all done, we can now move onto actually installing docker. Run the following command to download docker, “curl -sSL https://get.docker.com | sh”.
- Once downloaded, run “sudo usermod -aG docker pi”. Now 'pi' user can run docker without needing sudo.
- Run “docker version” to make sure everything installed correctly.
- Run this command so that you don't need to use 'sudo' anymore "sudo usermod -aG docker $USER"
- The same now needs to be done for all the pi zeros. However you cannot just ssh into them as they have no connection to the internet. If you have wifi enabled pi zeros you can skip this step and simply install using ssh.
- Turn off your machine, remove the sd card from the main pi 3 b and put in the sd card from p1.
- Boot up the machine. You will not be able to do anything else now as it has no drivers for mouse or keyboard.
- Boot up the machine. You will not be able to do anything else now as it has no drivers for mouse or keyboard.
- You will need a seperate computer to ssh into, we used windows, and putty to do so.
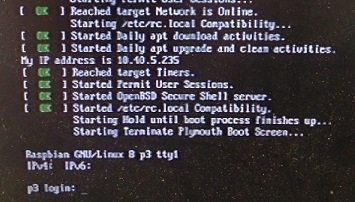
- To ssh into the device, there are multiple ways, however, only one worked for us. On boot up, it displays the ip address on the screen. Use this to gain access. Once in, simply follow step 6.
- Do the same for the rest of the sd cards, the ip address should be same for them all.
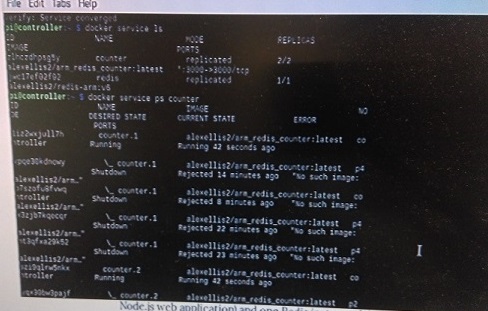
- Once docker is installed on all pi’s, run “docker info|grep Swarm”. You should see that the swarm is inactive.
- To start a swarm, run the following command on the main controller “docker swarm init”, or “docker swarm init --advertise-addr <ip>”.
- A token should be generated, “docker swarm join \
--token <random token docker generated> \
<controller ip>:”.
This needs to be pasted into each of the pi zeros, however there is a slight problem. The devices have no real time clocks, and are years behind, if you run this command it will simply state that the certificate is invalid. To fix this you will need to: - Change the time to the current using the command “for I in 1 2 3 4; do ssh pi@p$I.local sudo date +%Y%m%d -s "20180405"; shh pi@p$I.local sudo date %H%M%S -s +"12:35:00";done.(replace dates and times in quotes with your own values. A time script is also available @ time script, just replace the variables with your own current time)
- Do the same for all the pi zeros. It doesn't matter if there a couple minutes off.
- Once the times have been set, paste the token in each of the other pi zeros to add them to the swarm.
- To check that all have joined, run “docker node ls”.
A Taste of a Working Pi
This section provides you with all the sugar and ice cream you need to taste the results of a working Rasperberry Bush
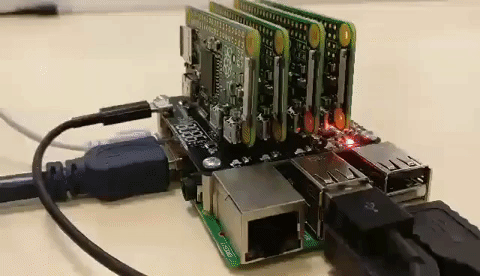
Watch Our Baking Video
This video is a demonstration of the Pi Bush in action
Our Portfolio
This section details the process from beginning to end for development of the Raspberry Pi Hat cluster


Our Team

Tomás Phelan
Pi@p1

Jake Murphy Smith
Pi@p2

Dmitrijs Lobanovskis
Pi@p3

Mingjie Shao
Pi@p4